AFMS: Short Manual for afeditor
Contents
- Overview
- Starting afeditor
- Create a new product database
- Open an existing product database
- Add features to the product
- Add requirements and link them to features
- Add use cases and link them to requirements or features
- Add test cases and link them to requirements
- Create test suites and attach test cases
- Adding text sections and glossary entries
- Tags for artefacts
- Deleting artefacts
- Export artefacts to HTML or XML format
- Import artefacts from another database
- Using filters to show only specific artefacts
- Archiving a database
- Statistics for the current artefact database
- Settings for afeditor
- Topics in the help menu
- Keyboard shortcuts
- Toolbar buttons
- Menu items
Overview
afeditor is the editor to create, edit and manage artefacts related to a software product. afeditor supports the following kinds of artefacts:
- Features
- Requirements
- Testcases
- Usecases
- Testsuites
In addition to these artefacts afeditor supports plain text sections and a glossary.
Here is a screenshot of the afeditor main window.
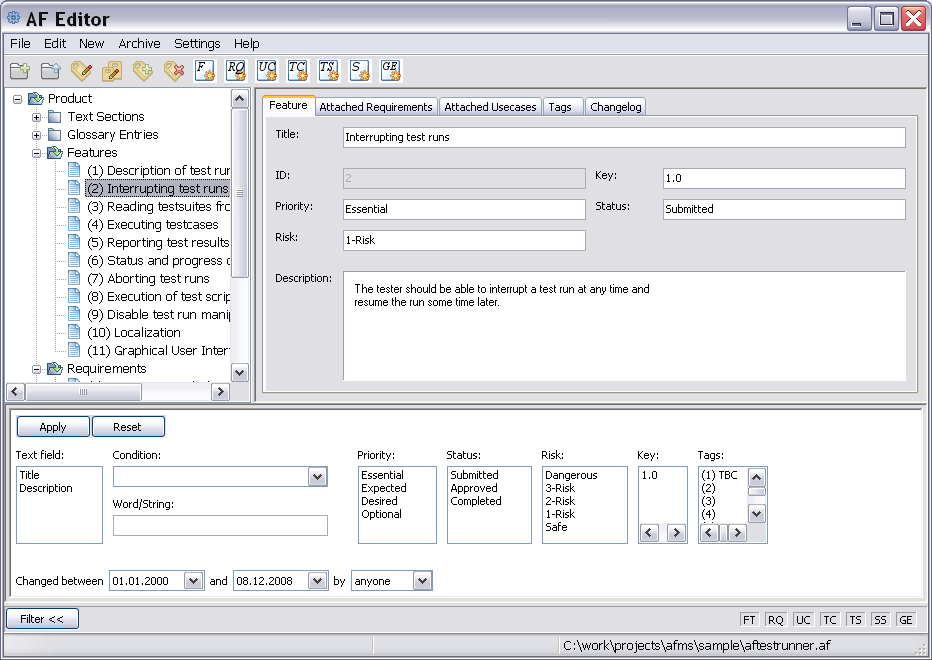
The top left panel contains a tree view of all artefacts. If you select an artefact node like Features or Requirements in the tree view an overview list of these artefacts is shown in the top right panel. If you select a specific artefact in the tree view the details of this artefact are shown in top right panel.
The lower panel contains the filter panel. Depending on the kind of artefact selected in the tree view the filter panel changes according to the artefact kind. Pressing the "Apply" button in the filter panel hides all artefacts in the tree view and the corresponding artefact list views which are not passing the filter. Pressing the "Reset" button turns off filtering. The filter view may be collapsed or expanded with the "Filter" button. The fields "FT", "RQ" and so on on the bottom right side are indicating which filters are active. For example if the testcases are filtered the indicator "TC" turns on green.
Actions in the afeditor are performed by selecting menu items, pressing toolbar buttons or using some shortcut keys. To edit an existing artefact either activate it in the tree view or in the list view (i.e. double click the artefact).
Starting afeditor
You may start afeditor from the command line calling "afeditor.py". For Microsoft Windows, if you don't like the console, you may run afeditor by double clicking the file afeditor.pyw in the explorer window. If you have downloaded the Win32 binary release simply execute afeditor.exe.
When running from command line you may enter several command line options. Type:
afeditor --help
to see the available options.
Create a new product database
To create a new database for a "software product" select the menu command "New Product" from the file menu and enter the database file name for the product in the subsequent dialog. Default suffix for an artefact dabase is .af.
Alternative to the menu command you can use the shortcut key Ctrl-N or press the toolbar
button  .
.
After creating the database you should edit the product properties. Double click the "Product" item in the tree view to open the "Edit product" dialog. Enter a product title and a more or less detailed description of the product. In the product description input field you may use either plain text, HTML markup or reStructuredText markup.
Finally press the "Save" button to save your changes to the database.
Open an existing product database
An existing product database can be opened with the menu command "Open product" from the file menu,
the shortcut key Ctrl-O or the toolbar button  .
You can als drag a database file and drop it in the tree view panel to get it opened.
A list with recently opened files is available to the "File" menu.
.
You can als drag a database file and drop it in the tree view panel to get it opened.
A list with recently opened files is available to the "File" menu.
Add features to the product
Features are a kind of top level artefacts. Features describe the properties and attributes of the software product at a rather general level. You also might call it goals of the software product if you don't like the term feature.
Features will be broken down to a set of requirements which are needed to implement the entire feature.
To create a new features select the "New feature" item from the "New" menu or press the corresponding
button  in the toolbar.
In the appearing dialog you have to enter i.e. the title and the description of the feature. Here are all data fields of a feature [1]:
Field Values Title Title or name of the feature. Description Description of the feature Priority
- Essential:
- The system could not or would never be used without this feature. It would be much harder to test, document, or package the product without this feature.
- Expected
- Key stakeholders strongly desire and expect this feature. It may have been promised to them in a certain release. It's absence would substantially reduce the success of the project.
- Desired
- Stakeholders desire this feature. It's absence would reduce the success of the project.
- Optional
- This feature would be nice to have. Adding it could have some advantage, but delaying it would not have a big effect on the success of the project
Risk
- Dangerous:
- Implementing this feature successfully would require overcoming risk factors that are more than three or unknown in number. It should be broken down into parts, better specified, or risk factors should be eliminated prior to implementation.
- 3-Risks:
- Implementing this feature would require three risk factors to be overcome. Any single release should contain at most a few such high-risk features, and contingency plans should be considered. You should be able to list the risks.
- 2-Risks:
- Implementing this feature would require two risk factors to be overcome. This is normal for challenging features. You should be able to list the risks.
- 1-Risk:
- Implementing this feature as specified would require one risk factor to be overcome. This is normal for many features. You should be able to describe the risk.
- Safe:
- Implementing this feature as specified is just a matter of time and effort, there is no real risk of failure.
Status Submitted, Approved, Completed Key
- Any string.
- A User definable key
Again, for the description, you may use plain text, HTML markup or reStructuredText markup.
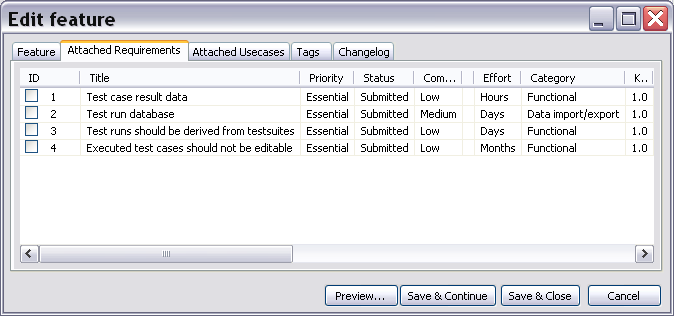
Along with the basic data of a feature a list of related requirements, related usecases and a changelog is provided. Select the tab "Attached requirements" or "Attached usecases" to see which requirements and usecases are attached to the current feature. You may check or uncheck requirements or usecases in the lists to attach or detach them from the feature.
As for almost all kinds of artefacts (except glossary entries) you may assign some tags to a feature. Simply go to the tab "Tags" and select the required tags.
To support a artefact history you may select the changelog tab and enter a change description. This description is mandatory once the status of the feature is "submitted". If the status is "completed" you are not allowed to change a feature. When you only view (not edit) a single feature the changelog panel shows a complete list of all changelog entries for the artefact.
After pressing the "Save" button in the dialog the feature is saved in the dabases and a unique ID is assigned to the feature.
To get an overview about all features select the "Feature" item in the tree view in the left panel. You will see a list with all features in the right panel. The list can be sorted by clicking into the column header.
Additionally you can use a filter to filter out all items you are currently not interested to see. The filter applies to the tree view and to the list view.
Add requirements and link them to features
Adding requirements to the product works the same way as adding features.
Select "New requirement" from the "New" menu or press the toolbar button  .
In the subsequent dialog with several tabs you may enter all the data for the requirement [1]:
.
In the subsequent dialog with several tabs you may enter all the data for the requirement [1]:
Title Title or name of the requirement Description Description of the requirement Priority
- Essential:
- The system could not or would never be used without this feature. It would be much harder to test, document, or package the product without this feature.
- Expected:
- Key stakeholders strongly desire and expect this feature. It may have been promised to them in a certain release. It's absence would substantially reduce the success of the project.
- Desired:
- Stakeholders desire this feature. It's absence would reduce the success of the project.
- Optional:
- This feature would be nice to have. Adding it could have some advantage, but delaying it would not have a big effect on the success of the project
Complexity Low, Medium, High Effort
- Months:
- A very large requirement that is too big to estimate and should be broken in to smaller, better-defined requirements.
- Weeks:
- A large requirment that will take 40 to 160 hours to add.
- Days:
- An average or easy requirement would take less than 40 hours to add.
- Hours:
- A very easy requirement that would take less than 8 hours to add
Note that "adding" a requirement means doing all of it's design, implementation, technical documentation, user documentation, and testing. Even the easiest requirement takes hours to add.
Category Functional, Reliability, Up-time, Safety, Security, Performance, Scalability, Maintainability, Upgradability, Supportability, Operability, Business life-cycle, System hardware, System software, API, Data import/export, Other Status Submitted, Approved, Completed Assigned To whom the requirement is assigned to Key A user definable key string Origin From where or from whom the requirement comes from Rationale The rationale behind the requirement
The tabs "Attached Testcases" and "Attached Usecases" shows a list with all test cases and use cases. You may select test cases and use cases belonging to the current requirement.
The tab "Related features" shows a list with the features to which the requirement belongs to. To edit this list, you have to edit each feature, select the "Attached Requirements" tab and check each requirement to be attached to the feature.
Another way to attach a new requirement to a feature is to select the feature in the tree view and issue the "New Requirement" menu command. The new requirement becomes automatically attached to the selected feature.
The requirement history works the same way as the feature history, see above.
Add use cases and link them to requirements or features
Select "New use case" from the "New" menu to create a use case.
Of course you also can use the corresponding toolbar button  .
.
Use cases have the following data fields [1]:
Summary A brief description of the use case Priority Essential, Expected, Desired, Optional. Use frequency Always, Often, Sometimes, Rarely, Once Stakeholders Stakeholders for the use case. You may enter stakeholders or select previously entered stakeholders from a list. Actors Actors for the use case. You may enter actors or select previously entered actors from a list. Prerequisites Prerequisites for the use case Main Scenario Main scenario of the use case Alternative Scenario Alternative scenarios to the main scenario Notes Notes and hints
The tab "Related requirements" shows the requirements to which the usecase belongs to. To edit this list, you have to edit each requirement, select the "Attached usecases" tab and check each usecase to be attached to the requirement.
You also can attach a new usecase to a requirement if you select the requirement in the tree view and issue the "New Usecase" menu command. The new usecase becomes automatically attached to the selected requirement.
Usacases may be linked to features too. This is done the same way as for requirements.
The usecase history works the same way as the feature history, see above.
Add test cases and link them to requirements
Select "New test case" or press the button  to create a test case.
Test cases have the following data fields [1]:
Title A brief description of the test case Key A user definable key string Purpose Purpose of the test case Prerequisite Prerequisite for the test case Testdata Testdate to be used in the test case Steps Steps to perform the test case Script URL or filename to a script implementing the testcase Notes and Questions Notes, hints and questions
Hint
It is recommended to enter a script file name relative to the path of the database. This allows to relocate your stuff more easier.
Similar to usecases the tab "Related requirements" shows the requirements to which the testcase belongs to. To edit this list, you have to edit each requirement, select the "Attached testcases" tab and check each testcase to be attached to the requirement.
You also can attach a new testcase to a requirement if you select the requirement in the tree view and issue the "New Testcase" menu command. The new testcase becomes automatically attached to the selected requirement.
The testcase history works the same way as the feature history, see above.
Create test suites and attach test cases
Test suites are simply collections of test cases. Here are the data fields of a test suite:
Title Title or name of the testsuite Description Description of the testsuite Execution order Comma seperated list with ID's of all testcases in testsuite defining the order in which testcases should be executed. If no order is required this field may be empty. Testcase list Testcases belonging to the testsuite
When creating a new test suite with either menu command "New testsuite" or toolbar button
 or editing an existing testsuite a list with all currently defined testcases
is shown. You may check any testcase that should be in the testsuite.
or editing an existing testsuite a list with all currently defined testcases
is shown. You may check any testcase that should be in the testsuite.
A testsuite is the basic input for the testrunner program, because testrunner allows 'execution' of all testcases in a testsuite.
Adding text sections and glossary entries
Adding text sections and glossary entries works quite the same as for other artefacts.
For new text sections select "New text section" from the "New menu" or press the corresponding
toolbar button  . A text section has the data fields
Title Title or header of the text section Content Content of the text section Level Position of text section within all text sections
As a special feature of text sections you can edit the order (level) of text sections. Select the "Text sections" icon in the tree view and press the button "Edit order" below the list of text sections. An editor will pop up where you can shuffle around the sections. The level defines the position of the text sections items in the tree view and in the HTML report.
Adding glossary entries could be done by selecting "New glossary entry" from the "New" menu or with
the button  from the toolbar.
A glossary entry has the fields
from the toolbar.
A glossary entry has the fields
Term Term or abbreviation to explain Description Description of the term or abbreviation
Tags for artefacts
Tags may be assigned to all artefacts except glossary entries. When creating a new artefact or edit an existing one, simply go to the "Tags" tab and select the tags to assign.
Tags itself can be edited with the menu command "Edit tags" from the "Edit" menu. You can set a short description, a detailed description and a color for a tag. The color of the tag is used to render the artefacts having this tag. If an artefact has several tags the color of the tag with the smallest ID is used.
All tags are saved in the database.
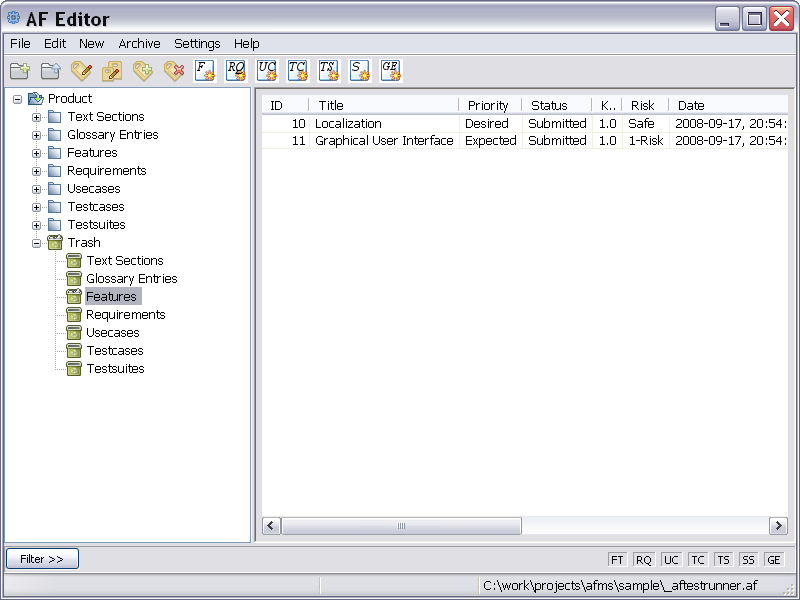
Deleting artefacts
You may delete a selected artefact using the toolbar button  , the menu command "Delete artefact"
from the "Edit" menu or simply with the Del key. Actually the artefact is not deleted but goes
to the trash. An artefact could be restored by double clicking it in the corresponding view of the trash.
, the menu command "Delete artefact"
from the "Edit" menu or simply with the Del key. Actually the artefact is not deleted but goes
to the trash. An artefact could be restored by double clicking it in the corresponding view of the trash.
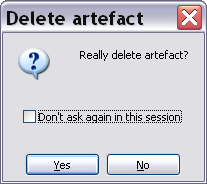
Deleting and restoring artefacts has to be confirmed. If this becomes annoying you may switch off the confirmation dialog for the rest of the current session:
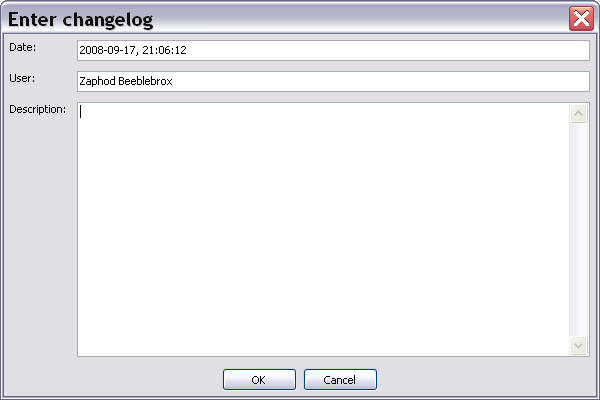
Before the artefact goes to the trash or is restored from the trash you may enter a changelog message:
Intentionally there is now way to empty the trash, so no artefact could get lost.
Export artefacts to HTML or XML format
You can export all artefacts of a product into a HTML or XML report file. XML reports only contains the artefacts and the relations between artefacts.
HTML reports contains some additional problem analysis:
- Features with no requirements attached
- Requirements with no test cases attached
- Use cases without related features or requirements
- Test cases without related requirements
- Test cases not in a test suite
- Test suites without test cases
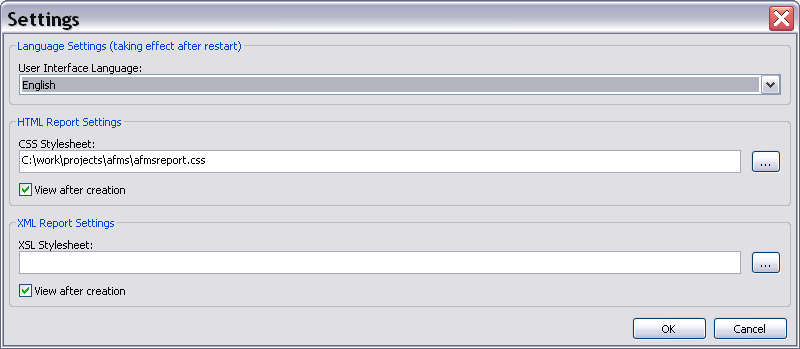
For HTML reports you may configure a cascading stylesheet to be included in the report in the dialog opened by the menu item "Settings/General". There you also can select to open the report after creation in the default browser.
In the same dialog you may configure a XSL stylesheet to be included in the XML report. And again you also can select to open the report after creation in the default viewer.
To create the report use the menu commands "Export as HTML" or "Export as XML" from the "File" menu.
Report creation could also be done using the standalone scripts afexporthtml.py and afexportxml.py. In the Win32 binary release these scripts are available as exexutables afexporthtml.exe and afexportxml.exe. Call them from the command line with the --help flag to see how to call the scripts.
Hint
The HTML report creates pure XHTML. So if you use HML markup in the multiline text fields you have to use XHTML too. Otherwise you have to expect error messages from your browser.
Import artefacts from another database
Importing artefacts is quite easy. After issuing the command "Import" from the "File" menu you can select the database file with the artefacts to import. After this a dialog with one tab for each kind of artefact is shown. Each tab contains a list with corresponding artefacts and you can check the artefacts to be imported.
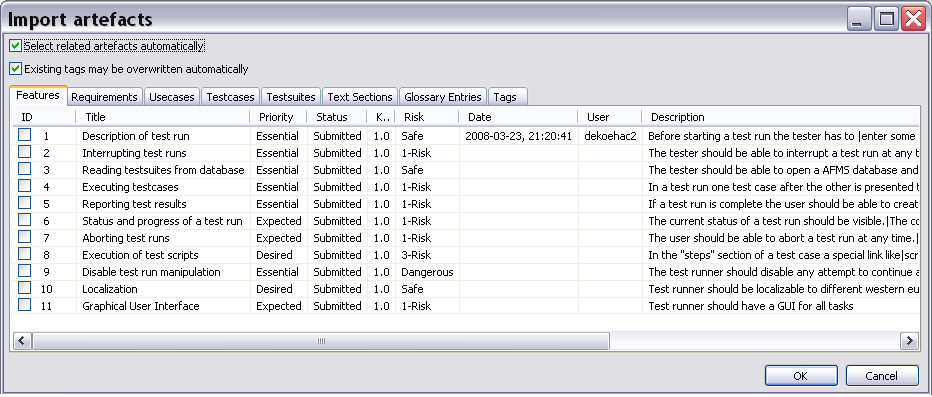
On top of the dialog there is a checkbox "Select related artefacts automatically". If it is checked and you check for example a requirement to be imported, then all test cases and use cases related to that requirement are checked and subsequently imported too.
If the checkbox "Existing tags may be overwrittten automatically" is checked any existing tags in the database may be overwritten by imported tags.
Using filters to show only specific artefacts
Pressing the botton "Filter" in the bottom panel expands or collapses the filter settings window.
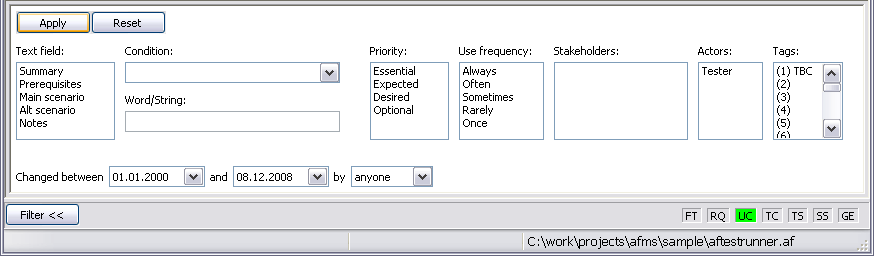
Filters are specific for each kind of artefact. The image above shows the filter window for use cases. There are 3 types of filter settings:
- Filter those artefacts where text fields fulfills a certain condition. In the example above only those use cases are shown where the text fields 'Main scenario' or 'Alt scenario' contains the string 'Save'. Other available conditions are for example "doesn't contain the word" or "matches the regexp" (regular expression).
- Filter those artefacts having the selected properties, i.e. where 'Priority' is "Essential' or 'Expected'.
- Filter artefacts changed within a certain time intervall by a certain user.
After changing the filter settings the button 'Apply' makes the filter to come into effect. Only artefacts passing the filter are shown in the tree view and the list views. The button 'Reset' clears all the the filter fields and switches filtering off.
Archiving a database
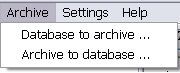
afeditor supports writing a artefact database to an archive and converting an archive to a database. The command "Database to archive" from the "Archive" menu asks for the name of the archive file and saves he current database to an archive.
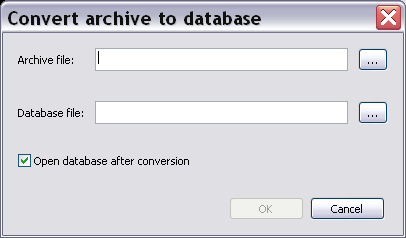
The opposite is done with the command "Archive to database" from the same menu. You are asked for the archive file name, the database file name and whether to open the database after conversion or not.
Archive format is XML. Main intention of archives is to have a human readable format which allows for generating diffs between or merging of different archive versions. Of course archives could be used to import and export from and to various other formats.
Creating an archive and converting an archive to a database may also be done using the standalone scripts afarchivetodb.py and afdbtoarchive.py. For the Win32 release the corresponding executables are available.
Statistics for the current artefact database
Select "Statistics" from the "File" menu to bring up the statistics for the current database.
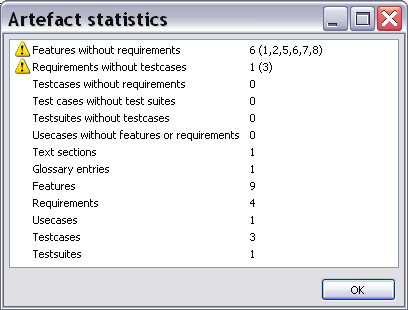
The dialog shows the number and ID's of
- features not linked to requirements
- requirements having no testcases
- testcases not belonging to requirements
- testcases not belonging to a testsuite
- empty testsuites
Additionally the count of each artefact kind is shown.
Topics in the help menu
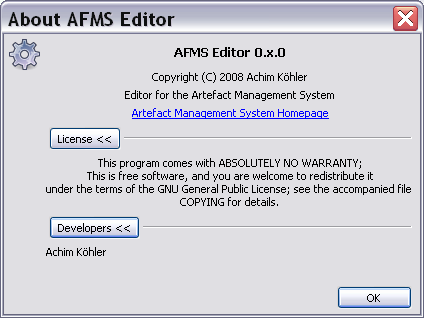
In the help menu you can open the "About" dialog and the "Feedack" dialog. The "About" dialog gives informations about the programm, license issues and developers of the program.
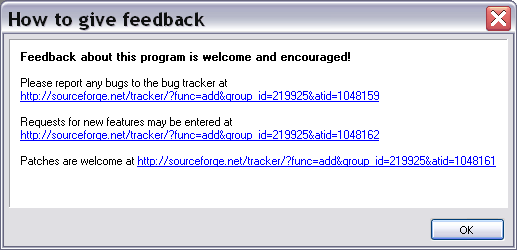
The "Feedback" dialog gives some hints about how to report bugs or how to request for new features. When clicking the links in the message window the URL's will be opended in your default browser.
Keyboard shortcuts
| Shortcut | Purpose |
|---|---|
| Ctrl-N | Create new product |
| Ctrl-O | Open existing product |
| Alt-X | Exit application |
| Ctrl-E | Edit selected artefact |
| Ctrl-C | Copy artefact to clipboard |
| Ctrl-V | Paste artefact from clipboard |
| Del | Delete selected artefact |
| Ctrl-A | check all items in a list |
| Shift-Ctrl-A | uncheck all items in a list |
| Space | Toggles the check state of the selected list item |
| Ctrl-Space | Toggles the check state of all list items |
Toolbar buttons
| Button | Purpose |
|---|---|
|
Crate new product |
|
Open existing product |
|
Create new features |
|
Create/attach new requirement |
|
Create/attach new usecase |
|
Create/attach new testcase |
|
Create new testsuite |
|
Create new text section |
|
Create new glossary entry |
 |
Edit selected artefact |
 |
Copy selected artefact to clipboard |
 |
Paste artefact from clipboard |
|
Delete selected artefact |
Menu items
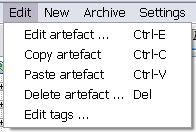
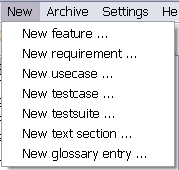
| File | Edit | New | Archive | Settings | Help |
|---|---|---|---|---|---|
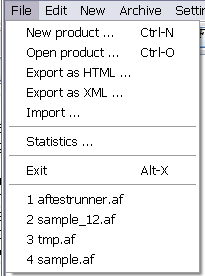 |
 |
 |
 |
 |
 |
| [1] | (1, 2, 3, 4) Some of the attribute descriptions are taken from the Ready-to-use Software Engineering Templates |